Model-making is not always about creating miniatures of the real world. My last work refers to that, because it's a representation of representation of reality. When this second representation is over 30 years old nintendo game, things get interesting.
Guide: how I made Contra game model
You probably have already seen post regarding Contra diorama (if not, here is the link) and you are interested in way of building it. I made a short guide divided into a few sections refering to the particular elements of this diorama.
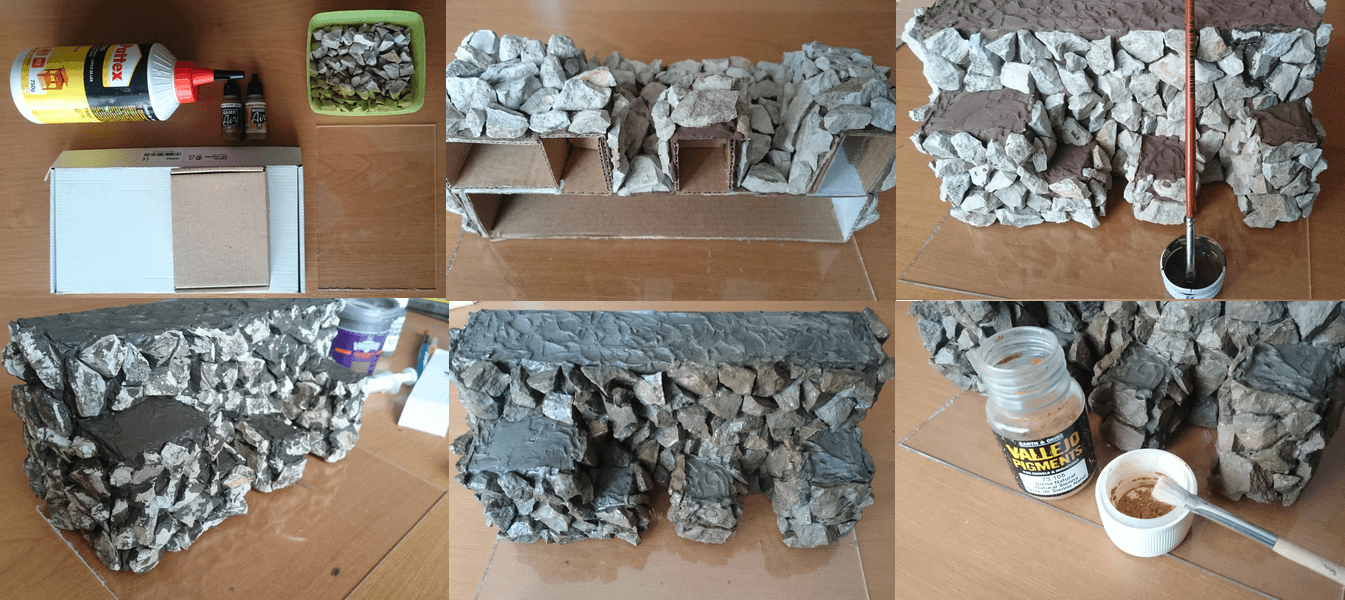
Step 1: Base and rocks
First of all, I used a Acrylic Plexiglass Sheet (PMMA) as baseplate to the whole model. Then I had to make characteristic brown rocks. Small cartboard was handy. I shaped square blocks, covered it with brown spackling compound ('Vidaron') and immediately I stick small marlstone. There was only painting to do - I used some Vallejo products (paints: 'earth', 'sand yellow' and 'siena natural' pigment).
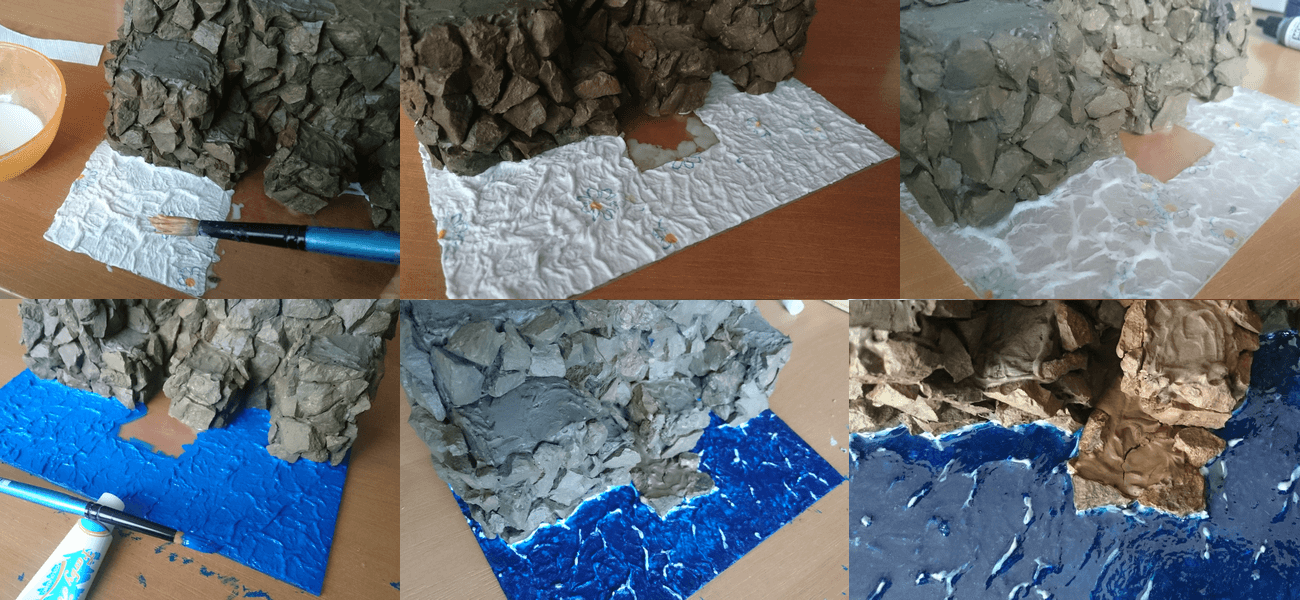
Step 2: water
The credit goes to 'marklinofsweden' - I used technique he presented in his tutorial on youtube https://www.youtube.com/watch?v=2TwpB7sVMn8 . I used it in the past and liked it very much - effective and inexpensive way to make water waves. You need some toilet paper (yes, it's not a joke), high gloss clear coat, wood glue, water and paintbrush.
You have to blend water with glue and apply it on the surface. Then you cover it with toilet paper sheet. Without any delay repeat the process 3 or 4 times: apply glue-water mix on the sheet that is already placed on the base, cover it again with water-glue mix and add next sheet of toilet paper. In that process you can easily shape desired waves. Let it dry, then paint. The last thing to do is to cover it with clear coat (4-5 layers in some time intervals).
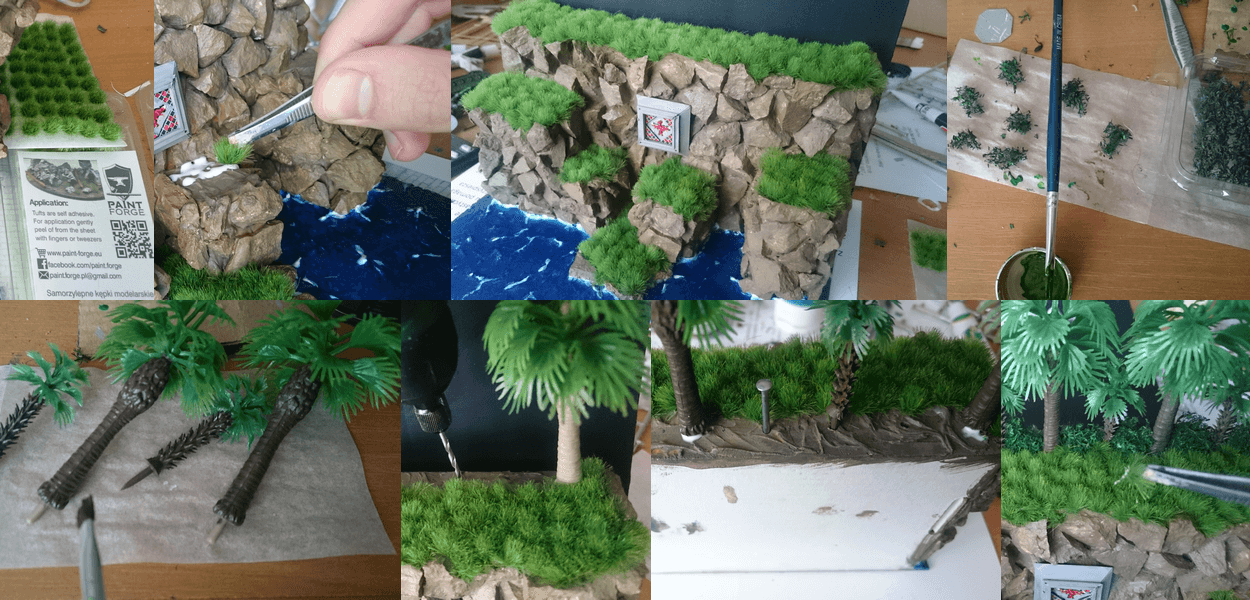
Step 3: plants and trees
Well, I used grass tufts made by PaintForge (‘forest’). It takes some time to cover bigger areas with these, but achieved effect is really good. I found also some nice palm trees made of plastic – I only had to change colors and stick them to the ground. I added some green bushes ('Miniatur' 945-22 S - Olive tree foliage, color has been changed) and that's it – it feels like a Contra Jungle now.
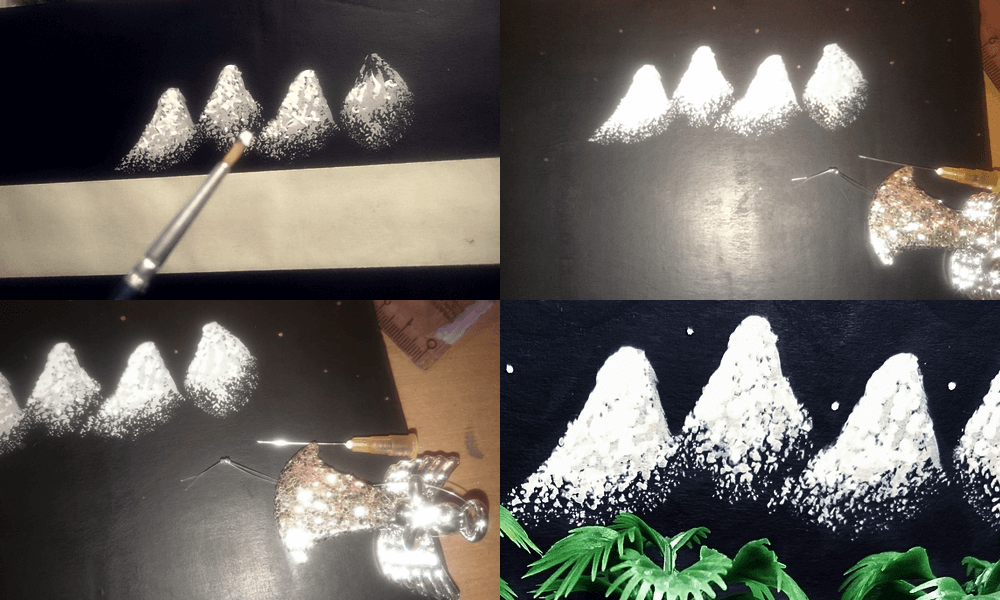
Step 4: background
That is kind of work I like. I have cut out the right size of cardboard, then cover edges with spackling compound and paint the whole thing black. Mountains was also created by applying paint - I used grey and white colors to match the original. As for adding stars, I didn't want to just use drops of white paint, I resolve it by using small, shiny circles from Christmas decoration, which were sticked with the help of and needle.
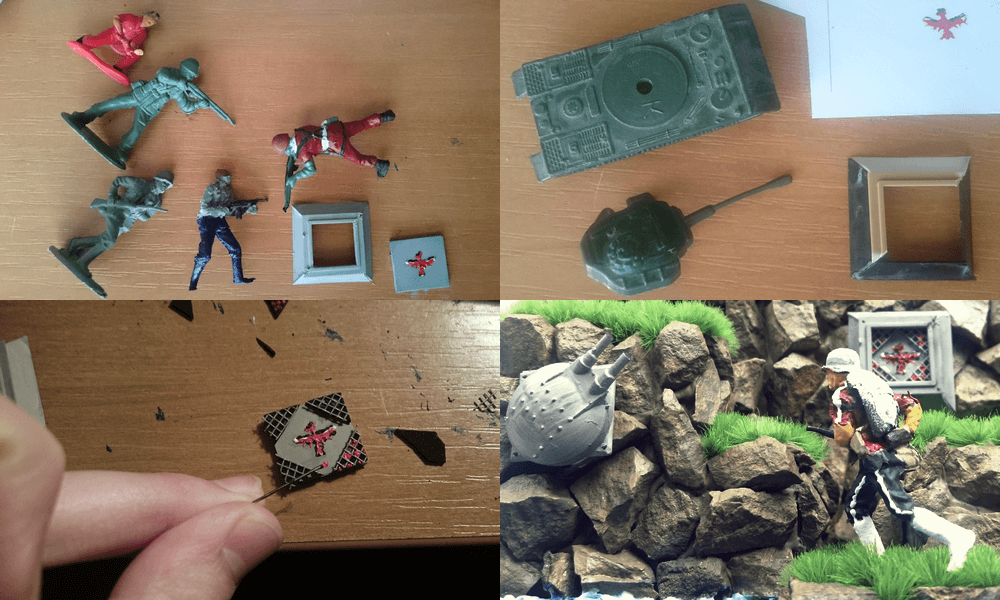
Step 5: figures and details
You can see 3 figures on my Contra model – in order to create them, I adapted old toy soldiers. First, I cut off bases and plastic defects with a sharp knife, there was also one head transplant with other figure; painting them was final step. I think there are ways to do it much better (3D printing was my first idea) but I was looking for a quick and inexpensive method.
There are also other 2 Contra elements placed on the rocks. I took a gun (or cannon) also from my toy soldiers collection (I had even 2 guns to choose from), I made base out of plastic plate, after some normal and dry painting it looks good. Making the second grey element (I don't know how I suppose to name it) was similar - base contains some plastics elements with addition of fence sheet (Faller 272420). Challenging thing due to required precison was making an eagle (I guess) inside it. I applied a few layers of paint with a pin.
Done
I am aware that there is room for improvments, but honestly I am satisfied with final result. As for low budget and around 25 man hours, this is what you may get.